Creating Your First Board
Learn how to create and customize boards in Kanman with backgrounds, icons, and accent colors.
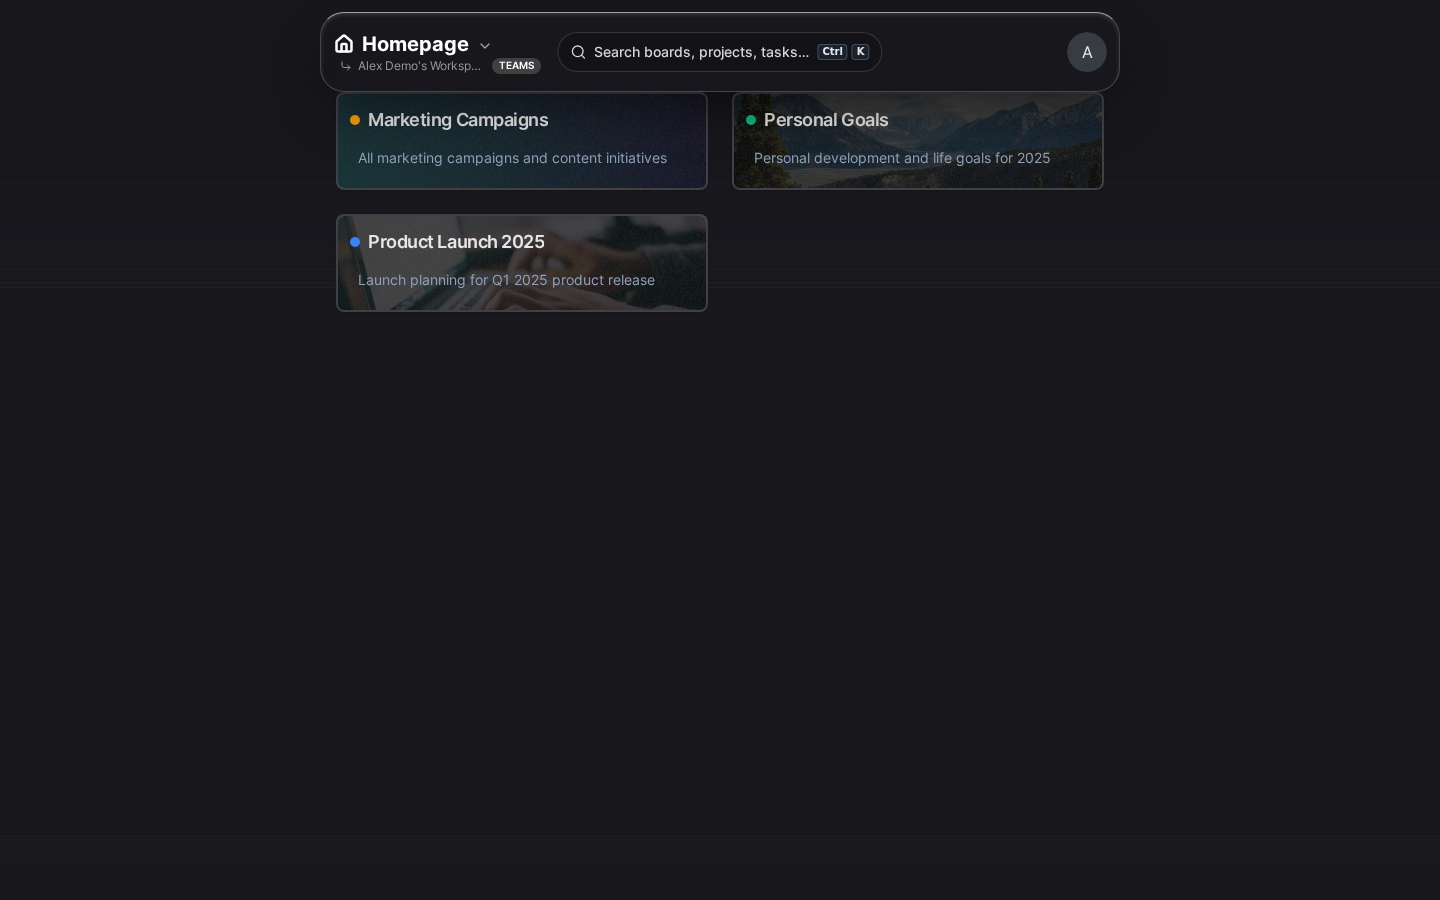
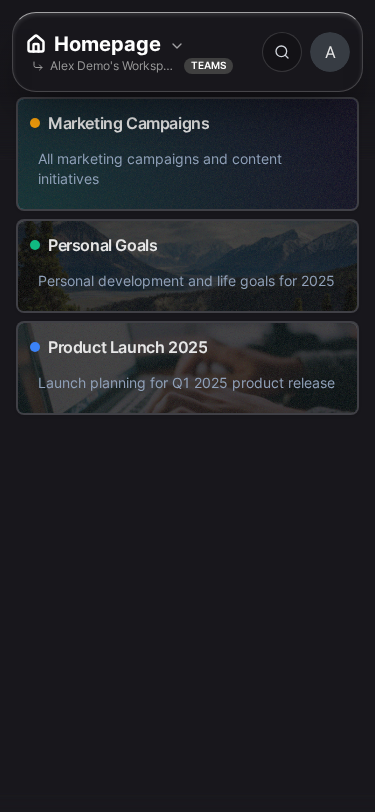
Boards are the foundation of your Kanman workspace—they’re the highest-level organizational unit where everything else lives. Think of each board as a dedicated space for a specific area of your work or life, containing all the projects and tasks related to that context.
Choosing the right board structure from the start will make your entire Kanman experience more organized and productive. This guide will help you create your first board and set it up for success.
Creating a Board
Creating a new board takes just a few seconds. You can start with a minimal setup and customize later, or take a moment to configure everything upfront.
- Click + New Board in the sidebar or on the homepage
- Enter a descriptive name that clearly identifies what this board is about
- Click Create for a quick start, or expand the customization options first
Your new board will appear in the sidebar immediately, ready for you to start adding projects and tasks.
Board Settings
Every board has settings that control its appearance and behavior. Access these anytime by clicking the gear icon in the board header.
General Settings
The general settings define the basic identity of your board:
- Name: The board’s display name, shown in the sidebar and board header. Keep it concise but descriptive—you’ll be reading this name many times a day. Maximum 255 characters.
- Description: Add context about what this board is for, what it contains, or any other notes that help you (or teammates) understand its purpose. The description supports rich text formatting including bold, italics, links, and lists.
- Icon: Choose from hundreds of icons in the Lucide library to give your board instant visual recognition. A well-chosen icon helps you find the right board quickly when scanning your sidebar.
Appearance
The appearance settings let you personalize your board’s visual style. A distinctive look helps you instantly recognize which board you’re working in and can make your workspace more enjoyable to use.

Background Options
You can set a background in three ways, depending on the aesthetic you’re going for:
- Solid Color: Pick any color using the color picker. Solid colors are clean, professional, and load instantly. Great for boards where you want minimal distraction.
- Unsplash Image: Search through millions of high-quality, free photos from Unsplash. Whether you want inspiring landscapes, abstract patterns, or cozy workspace vibes, there’s something for every taste. When you select an Unsplash image, Kanman automatically stores and displays the photographer’s credit.
- No Background: Keep it minimal with the default dark theme. This is the best option for maximum focus and fastest performance.
Accent Color
The accent color is used throughout the board’s interface to highlight important elements and create visual consistency. It appears in:
- Project header backgrounds and borders
- Progress bar fills showing task completion
- Interactive hover states and focus indicators
- Active state highlighting for selected items
Choose a color that helps distinguish this board visually from your other boards. Many users pick colors that match the board’s theme—green for finance, blue for tech projects, orange for creative work.
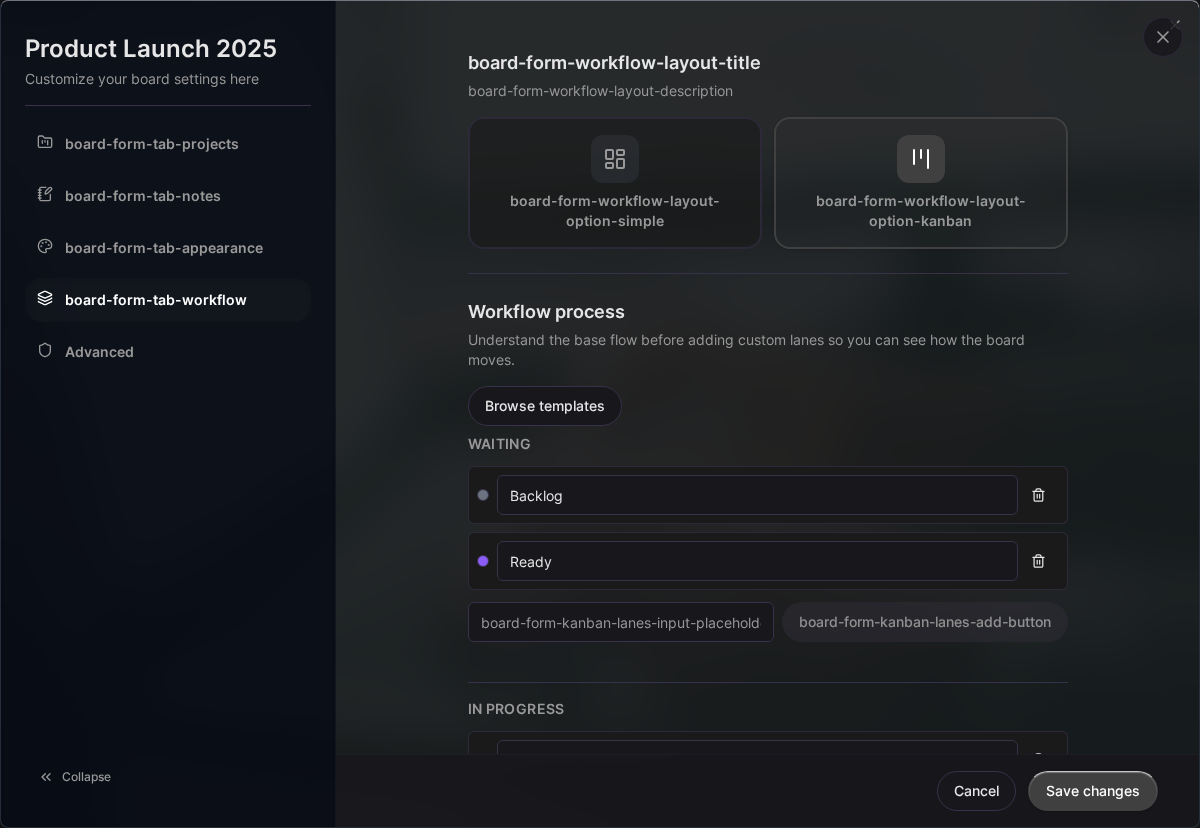
Layout Preference
Kanman offers two layout modes that fundamentally change how your tasks are displayed. Each has its strengths, and you can switch between them at any time without losing any data.

| Layout | Best For | How It Works |
|---|---|---|
| Simple | Quick task management, todo lists, backlogs | Projects appear as expandable cards stacked vertically. Tasks are listed within each project. |
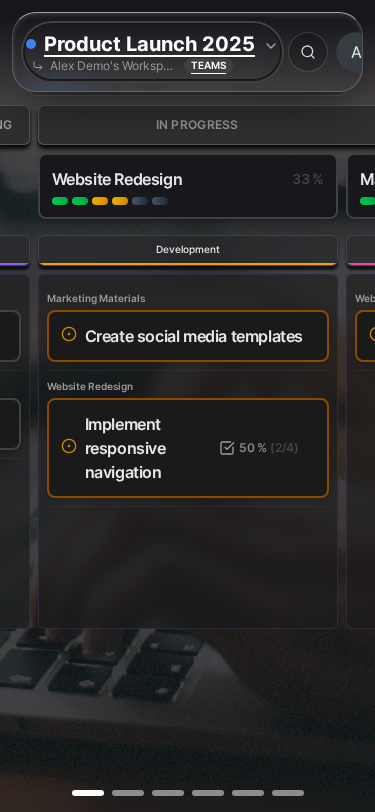
| Kanban | Visual workflow tracking, sprint planning, status-based work | Tasks appear as cards in columns based on their status. Drag cards between columns to change status. |
You can switch layouts at any time using the toggle in the board header. Your preference is saved per board, so you can have some boards in Simple mode and others in Kanban mode.

Board Limits by Plan
The number of boards you can create depends on your subscription plan. If you need more boards, consider upgrading or archiving boards you’re no longer actively using.
| Plan | Board Limit | Best For |
|---|---|---|
| Personal | 5 boards | Individual users with focused needs |
| Pro | 15 boards | Power users and freelancers managing multiple contexts |
| Teams | 50 boards | Teams and organizations with complex project structures |
Best Practices
Over time, we’ve seen patterns emerge in how the most organized users structure their boards. Here are some recommendations that will serve you well.
Naming Conventions
Your board names should immediately tell you what’s inside without having to open them. Future you will thank present you for being specific.
Good examples:
- “2024 Product Launch” — specific and time-bound
- “Client: Acme Corp” — clear context with client prefix
- “Personal Finance” — descriptive of the area
- “Home Renovation - Kitchen” — specific project with context
Avoid:
- “Board 1” — meaningless, will cause confusion
- “Stuff” — too vague to be useful
- “Work” — too broad, consider splitting into specific projects
One Board Per Context
Resist the urge to put everything in one giant board. Instead, create separate boards for distinct areas of your life or work. This keeps each board focused and manageable.
Consider creating separate boards for:
- Each major client if you’re a freelancer or consultant
- Each significant project that has its own timeline and goals
- Each life area such as work, personal, side projects, and hobbies
- Each team or department in larger organizations
A good rule of thumb: if two groups of tasks never need to be viewed together, they probably belong in separate boards.
Use Icons Strategically
Icons provide instant visual recognition when scanning your sidebar. Choose icons that logically represent each board’s content:
- Briefcase — work and professional boards
- Home — personal and household boards
- Lightbulb — ideas, brainstorming, and innovation boards
- Chart — analytics, metrics, and reporting boards
- Users — team and collaboration boards
- Code — development and technical projects
- Palette — design and creative projects
Consistency helps—if all your client boards use a users icon and all personal boards use a home icon, you’ll build muscle memory for finding what you need.
Editing a Board
Board settings can be changed at any time without affecting your existing projects or tasks.
- Open the board you want to edit
- Click the Settings icon (gear) in the board header
- Make your changes in the settings drawer
- Changes save automatically—no need to click a save button
Deleting a Board
When a board is no longer needed, you can delete it to keep your workspace clean. Deletion is a reversible action with a safety net.
- Open the board settings
- Scroll to the bottom of the settings drawer
- Click Delete Board
- Confirm the deletion in the dialog
Important: Deleted boards go to the Trash and can be recovered within 40 days. After that grace period, the board is permanently deleted along with all its projects, tasks, and subtasks. This cannot be undone, so make sure you’ve exported any data you need before the 40-day window expires.
Next Steps
Now that you have your first board set up, continue building out your workspace:
- Understanding Projects - Learn how to organize work within your board using projects
- Kanban View - Set up visual workflow lanes for status-based task management
- Board Notes - Add documentation, context, and reference information to your board
Last updated: January 1, 0001
Try Kanman